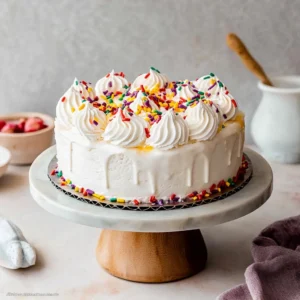
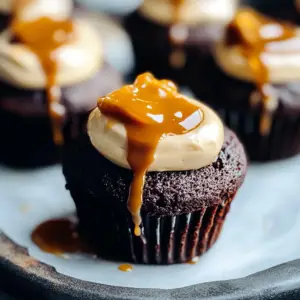
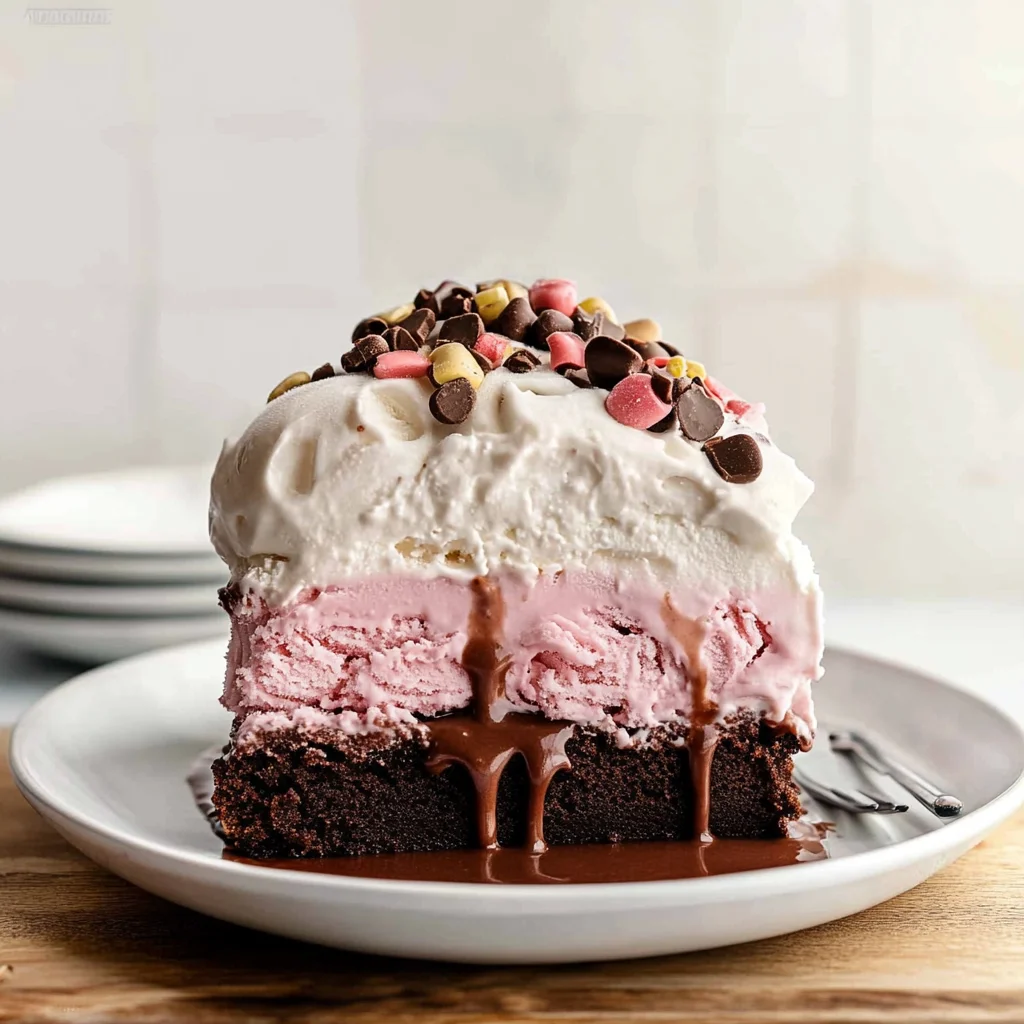
Imagine slicing into a delightful ice cream cake, the rich chocolate layers revealing a creamy, velvety vanilla center that melts in your mouth. The combination of fluffy cake and smooth ice cream creates an irresistible treat perfect for any celebration.

This ice cream cake recipe is not only simple to follow, but it also promises to impress friends and family alike. With just a few steps, you can create a stunning dessert that combines nostalgia and indulgence, making every occasion feel special.
Quick Overview
This delightful ice cream cake combines rich chocolate cake layers with creamy vanilla ice cream, creating a deliciously indulgent treat. Perfect for celebrations or warm summer days, it offers a satisfying balance of flavors and textures that will please everyone. Serve it chilled for a refreshing dessert that’s sure to impress your guests. Now, let’s dive into the detailed recipe!
Why This Recipe Works
- This ice cream cake recipe strikes a perfect balance between rich chocolate layers and creamy vanilla ice cream.
- The careful layering technique ensures each slice offers a delightful blend of flavors and textures.
- Furthermore, the chocolate ganache adds an elegant finish that elevates the overall presentation.
- Overall, this recipe is a reliable choice for any celebration, guaranteeing smiles with every bite.
Now that you have the perfect foundation, let’s explore some creative variations to customize your ice cream cake.
Essential Ingredients
To create a delightful ice cream cake, gather the following essential ingredients:
- All-purpose flour: Sifted to ensure a light texture in your chocolate cake layers; essential for structure.
- Granulated sugar: Sweetens the cake and balances the rich cocoa flavor; use fine sugar for even mixing.
- Unsweetened cocoa powder: Choose high-quality cocoa for a rich, deep chocolate flavor; sift to avoid clumps.
- Baking powder: A leavening agent that helps the cake rise; ensure it’s fresh for best results.
- Baking soda: Works with baking powder to provide additional lift; measure accurately for optimal texture.
- Salt: Enhances the overall flavor of the cake; don’t skip it, even in desserts!
- Large egg: Use at room temperature for better incorporation into the batter, contributing to moisture and richness.
- Whole milk: Adds creaminess and moisture; also best at room temperature to mix smoothly.
- Vegetable oil: Keeps the cake moist and tender; can substitute with melted butter if desired.
- Vanilla extract: Provides depth of flavor; opt for pure vanilla extract for the best taste.
- Boiling water: Helps dissolve the cocoa and creates a smoother batter; adds moisture to the finished cake.
- Vanilla ice cream: Softened slightly to easily spread over the cake layers; choose premium quality for best results.
- Heavy cream: Essential for making a luscious chocolate ganache; use cold cream for better emulsion with chocolate.
- Semi-sweet chocolate: Chopped finely to melt evenly into ganache; select high-quality chocolate for rich flavor.
- Chocolate shavings (optional): For decoration, use a vegetable peeler on a chocolate bar or block to create elegant curls.
- Whipped cream (optional): Light and fluffy topping that complements the rich flavors of the cake; homemade is recommended.
The full ingredients list, including measurements, is provided in the recipe card directly below.
How to Make ice cream cake
Step 1: Prepare the Chocolate Cake:Preheat your oven to 350°F (175°C). Grease and line two 9-inch round cake pans. In a bowl, whisk together the dry ingredients until well combined, noticing the rich cocoa aroma.
Step 2: Combine Wet Ingredients:In another bowl, mix the egg, milk, vegetable oil, and vanilla extract until smooth. The mixture should be creamy and fragrant, inviting you to continue.
Step 3: Mix Batter & Bake:Add wet ingredients to the dry ones and stir until just combined. Gradually incorporate boiling water for a thin batter. Pour evenly into pans and bake for 25-30 minutes until a toothpick comes out clean.
Step 4: Cool Cakes Completely:Once baked, let the cakes cool in their pans for 10 minutes. Then transfer them to a wire rack; they should feel firm yet springy when touched.
Step 5: Assemble with Ice Cream:After cooling completely, place one cake layer on a platter. Spread softened vanilla ice cream evenly on top before gently placing the second layer on it.
Step 6: Freeze & Prepare Ganache:Cover the assembled cake with plastic wrap and freeze for at least 2 hours to firm up. Meanwhile, make chocolate ganache by heating cream and melting chocolate until smooth and glossy.
This delightful process culminates in a beautifully layered treat that’s perfect for any celebration or indulgent moment!
Common Mistakes to Avoid
- One common mistake when making ice cream cake is not allowing the cake layers to cool completely, which can cause the ice cream to melt.
- Another frequent error is using ice cream that’s too hard, making it difficult to spread evenly over the cake layer.
- Lastly, pouring hot ganache directly onto the frozen cake can lead to a soggy texture instead of a smooth finish.
These considerations are essential for achieving that perfect balance of flavors and textures in your ice cream cake.
Pro Tips for Best Results
1. Ensure your cake layers are completely cool before adding the ice cream; this prevents melting and maintains the cake’s structure.
2. For a smoother chocolate ganache, allow the cream to simmer gently without boiling, ensuring you achieve that glossy finish.
3. If you want perfect slices, use a hot knife to cut through the ice cream cake; it makes serving much easier and neater.
With these pro tips in hand, let’s dive into some creative ideas for personalizing your ice cream cake!
Make It Your Way
- Feel free to customize your ice cream cake by swapping the vanilla ice cream for your favorite flavors, such as chocolate, mint, or even strawberry for a fruity twist.
- You can also experiment with different cake bases, like a rich red velvet or a gluten-free option using almond flour.
- For an extra layer of fun, consider adding crushed cookies or fresh fruit between the cake and ice cream layers.
- Let your imagination run wild while keeping the essence of this delightful dessert intact!
With these creative suggestions in mind, let’s dive into the essential tips for perfecting your ice cream cake-making technique.
What to Serve With It
Pair your delicious ice cream cake with fresh fruit, such as strawberries or raspberries, for a refreshing contrast. A scoop of chocolate or vanilla ice cream on the side enhances the dessert experience. For drinks, consider serving it with a cold glass of milk or a rich hot chocolate.
Now that you have the perfect serving suggestions, let’s explore how to customize your ice cream cake!
Make-Ahead & Meal Prep
This ice cream cake can be prepared a day in advance, making it perfect for parties. Bake the chocolate cake layers and freeze them; assemble with softened ice cream, then refreeze. For optimal texture, avoid leaving the cake out too long before serving to maintain its firmness.
Now that you know how to prepare this delicious dessert in advance, let’s explore some creative decoration ideas!
Storing & Reheating
To maintain the best texture and flavor of your ice cream cake, store it in the freezer for up to one month. When ready to enjoy, remove from the freezer and let it sit at room temperature for 10-15 minutes before slicing for easier serving.
Now that you know how to store your creation, let’s explore some delightful decoration ideas!
Troubleshooting & Fixes
If your ice cream cake turns out too soft, ensure the ice cream is properly frozen before layering it between the cake. For a dry chocolate cake, check that you’re not overmixing the batter and measure ingredients accurately. Lastly, if the ganache isn’t smooth, gently reheat it while stirring until it regains its glossy texture.
Now that you’re equipped for success, let’s dive into some creative serving suggestions!
FAQ
What is an ice cream cake made of?
An ice cream cake typically consists of layers of cake, softened ice cream, and chocolate ganache.
How long can I keep my ice cream cake in the freezer?
You can store your ice cream cake in the freezer for up to two weeks without losing quality.
Can I customize the flavors of my ice cream cake?
Absolutely! Feel free to experiment with different ice cream flavors and cake combinations for a unique dessert.
With these tips in mind, let’s explore some delicious serving suggestions for your homemade ice cream cake.
Ice Cream Cake
Ingredients
- 1 cup all-purpose flour sifted
- 1 cup granulated sugar
- 1/3 cup unsweetened cocoa powder sifted
- 1 teaspoon baking powder
- 1/2 teaspoon baking soda
- 1/4 teaspoon salt
- 1 large egg room temperature
- 1/2 cup whole milk room temperature
- 1/4 cup vegetable oil
- 1 teaspoon vanilla extract
- 1/2 cup boiling water
- 1 quart vanilla ice cream softened slightly at room temperature
- 1 cup heavy cream
- 8 ounces semi-sweet chocolate chopped
- 1/2 cup chocolate shavings
- 1/4 cup whipped cream
Method
- Preheat your oven to 350°F (175°C). Grease and line two 9-inch round cake pans with parchment paper.
- In a large mixing bowl, combine the flour, sugar, cocoa powder, baking powder, baking soda, and salt. Whisk together until well combined.
- In another bowl, whisk together the egg, milk, vegetable oil, and vanilla extract until smooth.
- Add the wet ingredients to the dry ingredients and mix until just combined. Gradually stir in the boiling water until the batter is smooth and thin.
- Divide the batter evenly between the prepared pans. Bake for 25-30 minutes or until a toothpick inserted in the center comes out clean.
- Allow the cakes to cool in the pans for 10 minutes, then transfer to a wire rack to cool completely.
- Once the cakes are completely cooled, place one layer on a serving platter. Spread the softened vanilla ice cream evenly over the top of the first layer.
- Place the second cake layer on top of the ice cream. Cover the cake with plastic wrap and freeze for at least 2 hours to firm up the ice cream.
- In a double boiler or microwave-safe bowl, heat the heavy cream until just simmering.
- Remove from heat and add the chopped chocolate. Let it sit for a few minutes, then stir until smooth and glossy.
- Let the ganache cool slightly before pouring it over the frozen cake.
- Remove the cake from the freezer and pour the chocolate ganache over the top, allowing it to drip down the sides.
- If desired, decorate with chocolate shavings and whipped cream. Return to the freezer for 30 minutes to set the ganache.
- Slice and serve the cake directly from the freezer for the best texture.