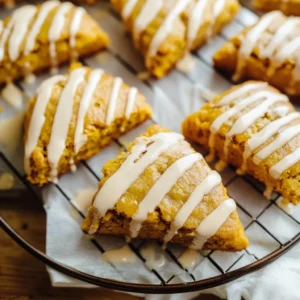
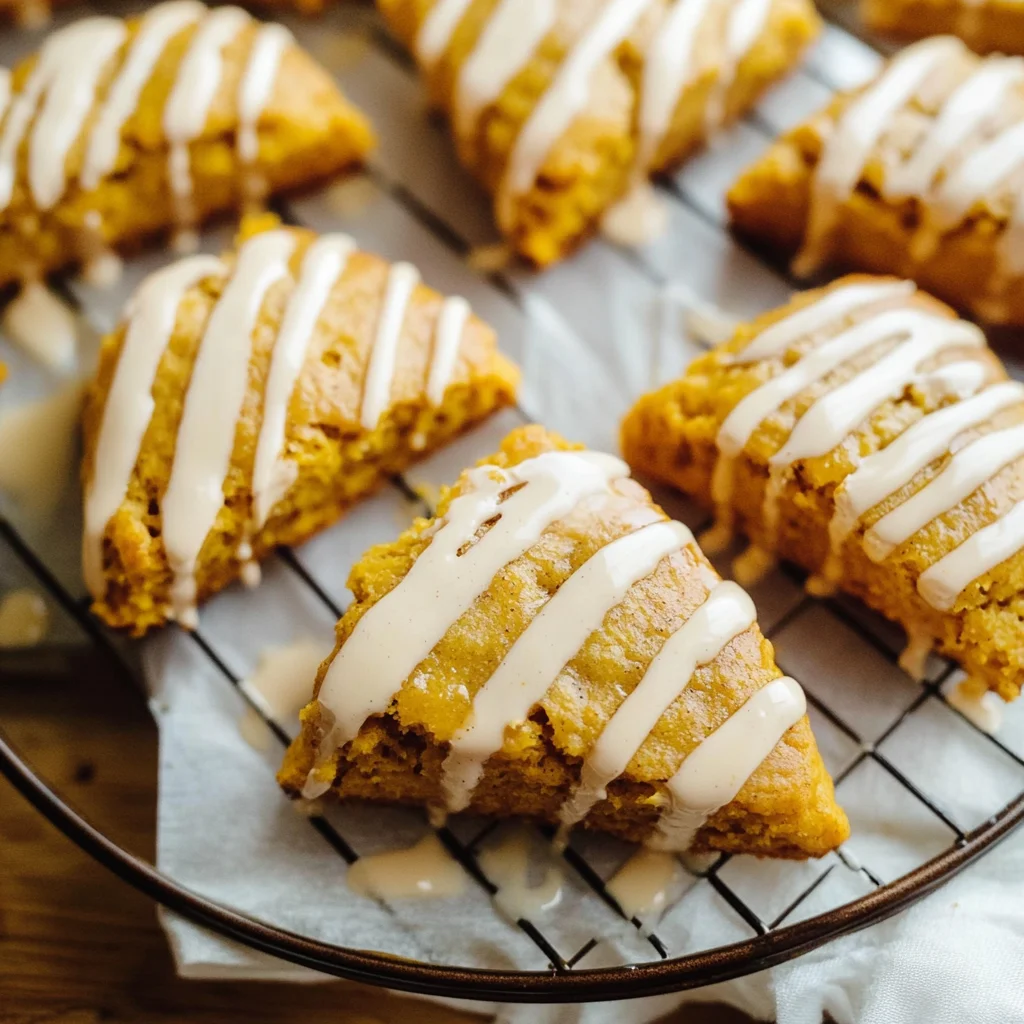
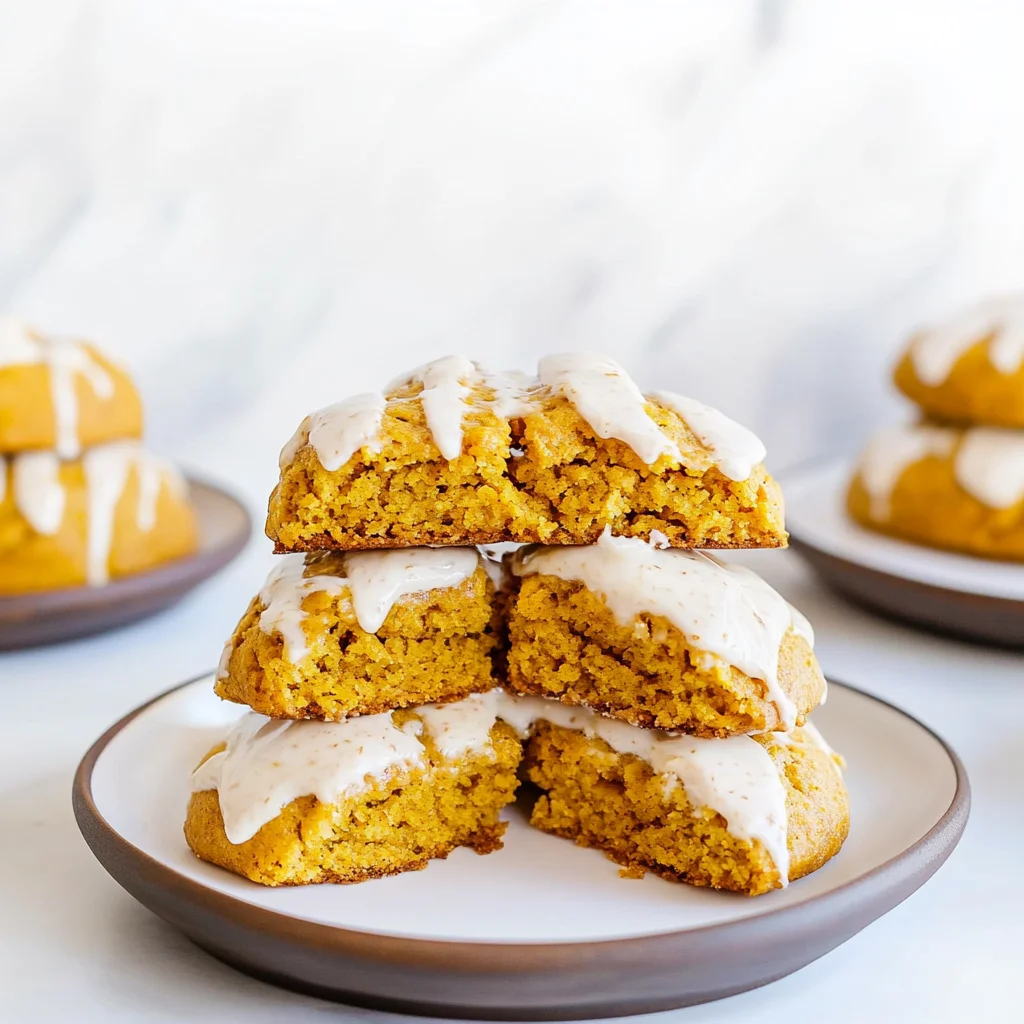
The smell of fresh pumpkin scones baking fills the kitchen with a warm, inviting aroma. They have a light, tender texture that’s perfect with coffee or tea.
You can definitely make these scones at home. Follow the steps closely, and don’t worry if they aren’t perfect; they’ll still taste great.
Why This Recipe Works
This pumpkin scones recipe achieves a perfect balance of moisture and flakiness thanks to the combination of cold butter and canned pumpkin puree. The use of baking powder and baking soda ensures a good rise, while the warm spices complement the pumpkin beautifully. Following the steps closely guarantees consistently delicious results every time.
Now that you know why this recipe is effective, let’s explore how to prepare these delightful scones step by step.
The One Thing That Makes It Work
- The key to making perfect pumpkin scones lies in using cold, cubed unsalted butter.
- This step is crucial as it creates the flaky texture that makes these scones light and tender.
- Be sure not to overmix when incorporating the wet ingredients for the best results.
Now that we’ve highlighted the important tip for achieving great pumpkin scones, let’s move on to the detailed steps of preparing this delightful treat.
Essential Ingredients
To create delightful pumpkin scones, gather the following essential ingredients.
- 2 cups all-purpose flour (sifted): Sifting helps aerate the flour, ensuring a lighter texture in your scones.
- 1 tablespoon baking powder: This leavening agent is crucial for achieving the perfect rise and fluffiness.
- 1 teaspoon baking soda: It works alongside baking powder to help the scones rise effectively during baking.
- 1 teaspoon ground cinnamon: Adds warmth and classic fall flavor that complements the pumpkin perfectly.
- 1/2 teaspoon ground nutmeg: A little nutmeg goes a long way in enhancing the aromatic profile of these scones.
- 1/2 teaspoon ground ginger: This ingredient adds a subtle spiciness that balances the sweetness of the scones.
- 1/2 teaspoon salt: Enhances all flavors, making sure your pumpkin scones taste balanced and delightful.
- 1/4 cup granulated sugar: Just enough sweetness to complement the spices without overpowering the pumpkin flavor.
- 1/2 cup unsalted butter (cold, cubed): Using cold butter creates flaky layers; avoid letting it soften before mixing.
- 1 cup canned pumpkin puree (not pumpkin pie filling): Ensure you’re using pure pumpkin puree for an authentic flavor and texture.
- 1 large egg (lightly beaten): Provides moisture and binds the ingredients together for better structure.
- 1/4 cup heavy cream (for brushing): Brushing with cream gives a beautiful golden finish to your baked scones.
- 1 cup powdered sugar (sifted): Essential for making a smooth glaze that adds sweetness on top of the scones.
- 2 tablespoons milk (or more for desired consistency): Adjust this ingredient to achieve the perfect glaze thickness you prefer.
- 1/2 teaspoon vanilla extract: Adds a subtle depth of flavor to the glaze, enhancing its overall taste.
Do This, Not That
- For your pumpkin scones, make sure to use canned pumpkin puree instead of pumpkin pie filling, as the latter contains added spices and sugars that alter the flavor.
- It’s important to select cold, cubed unsalted butter rather than softened butter, which can lead to denser scones instead of the desired flaky texture.
- Lastly, ensure you sift the all-purpose flour before measuring it; this prevents packing and promotes a lighter scone.
Now that you have the essential tips for perfecting your pumpkin scones, let’s explore the step-by-step recipe to create them!
Step-by-Step Method
Start by preheating your oven to 400°F (200°C). This temperature is key for helping the pumpkin scones rise beautifully while achieving a golden-brown finish. Line a baking sheet with parchment paper to keep your scones from sticking and make cleanup easier.
In a large mixing bowl, whisk together the sifted flour, baking powder, baking soda, ground cinnamon, nutmeg, ginger, salt, and granulated sugar. The mixture should look even and smell fragrant from the spices. This step ensures that all the dry ingredients are well combined before adding the wet ones.
Next, take the cold, cubed butter and add it to your dry mixture. Using a pastry cutter or fork, work the butter into the flour until it resembles coarse crumbs. You want to feel some little bits of butter throughout; this will help create a flaky texture in your scones.
In a separate bowl, mix together the canned pumpkin puree and beaten egg until fully combined. This mixture adds moisture and rich flavor to your scones. You’ll notice a lovely orange color that hints at the deliciousness to come.
Pour the pumpkin mixture into your dry ingredients. Gently stir with a spatula until just combined; be careful not to overmix. The dough should be slightly sticky but manageable. Turn it out onto a lightly floured surface and pat it into a circle about one inch thick.
Cut the dough into eight wedges using a sharp knife or bench scraper, transferring them to your prepared baking sheet with space between each piece. Brush their tops with heavy cream for an appealing golden color as they bake. Pop them in the oven for 20-25 minutes until they are lightly golden and spring back when touched.
Once they’re done baking, let your pumpkin scones cool on a rack for about ten minutes while you prepare the glaze of powdered sugar, milk, and vanilla extract. A drizzle of this glaze will elevate their sweet flavor just before serving them warm. Now that you have baked your pumpkin scones, let’s move on to preparing that delightful glaze!
Troubleshooting (If Something Goes Wrong)
If your pumpkin scones are too dry, it may be due to overmixing or using too much flour; try adding a bit more pumpkin puree next time. If they spread too much while baking, ensure your butter is cold and properly cut into the mixture for better structure. Remember, mistakes happen, and with these adjustments, you’ll improve each time.
Now that you’re equipped with troubleshooting tips, let’s explore some delicious serving ideas for your pumpkin scones.
Variations You’ll Actually Want to Try
For a fun twist on your pumpkin scones, consider adding chocolate chips or dried cranberries for a hint of sweetness. You can also experiment with different spices like cardamom or allspice to change up the flavor profile. Feel free to swap in brown sugar for a richer taste, making these scones your own while enjoying the classic recipe. Now that you’re inspired, let’s explore some serving suggestions!
Pick Your Flavor Path
- For a spicy twist, add a pinch of cayenne pepper to the dry ingredients for a gentle heat.
- To bring a fresh element, fold in some finely grated orange zest into the pumpkin mixture before combining it with the dry ingredients.
- If you’re craving something cheesy, sprinkle in some grated sharp cheddar cheese just before shaping the scones for an unexpected savory note.
Now that you have your flavor directions, let’s move on to preparing these delightful pumpkin scones!
FAQ
How long do pumpkin scones take to bake?
Pumpkin scones typically take 20-25 minutes to bake until golden and cooked through.
Can I substitute fresh pumpkin for canned pumpkin puree in pumpkin scones?
Canned pumpkin puree is recommended for consistency; fresh pumpkin may alter texture and moisture.
What is the best way to store leftover pumpkin scones?
Store leftover pumpkin scones in an airtight container at room temperature for up to two days.
These answers should help clarify any doubts you may have as you prepare your delicious pumpkin scones.
Pumpkin Scones
Ingredients
- 2 cups all-purpose flour sifted
- 1 tablespoon baking powder
- 1 teaspoon baking soda
- 1 teaspoon ground cinnamon
- 1/2 teaspoon ground nutmeg
- 1/2 teaspoon ground ginger
- 1/2 teaspoon salt
- 1/4 cup granulated sugar
- 1/2 cup unsalted butter cold, cubed
- 1 cup canned pumpkin puree not pumpkin pie filling
- 1 large egg lightly beaten
- 1/4 cup heavy cream for brushing
- 1 cup powdered sugar sifted
- 2 tablespoons milk or more for desired consistency
- 1/2 teaspoon vanilla extract
Method
- Preheat your oven to 400°F (200°C). This ensures that the scones bake evenly and rise properly.
- Line a baking sheet with parchment paper to prevent sticking and make cleanup easier.
- In a large mixing bowl, whisk together the flour, baking powder, baking soda, cinnamon, nutmeg, ginger, salt, and sugar. This step combines the dry ingredients and ensures even distribution of the leavening agents and spices.
- Add the cold, cubed butter to the dry mixture. Using a pastry cutter or fork, cut the butter into the flour mixture until it resembles coarse crumbs. This creates a flaky texture in the scones.
- In a separate bowl, mix the pumpkin puree and beaten egg until well combined. This adds moisture and flavor to the scones.
- Pour the pumpkin mixture into the dry ingredients. Stir gently with a spatula until just combined. Be careful not to overmix, as this can lead to tough scones.
- Turn the dough out onto a lightly floured surface. Pat it into a circle about 1-inch thick. Cut into 8 wedges using a sharp knife or a bench scraper.
- Transfer the scones to the prepared baking sheet, spacing them about 2 inches apart.
- Brush the tops of the scones with heavy cream to give them a golden color when baked.
- Bake in the preheated oven for 20-25 minutes, or until the scones are lightly golden and a toothpick inserted into the center comes out clean.
- While the scones are baking, prepare the glaze by whisking together the powdered sugar, milk, and vanilla extract in a small bowl until smooth. Adjust the milk to achieve your desired consistency.
- Once baked, remove the scones from the oven and let them cool on a cooling rack for about 10 minutes.
- Drizzle the glaze over the warm scones before serving for a sweet finish.