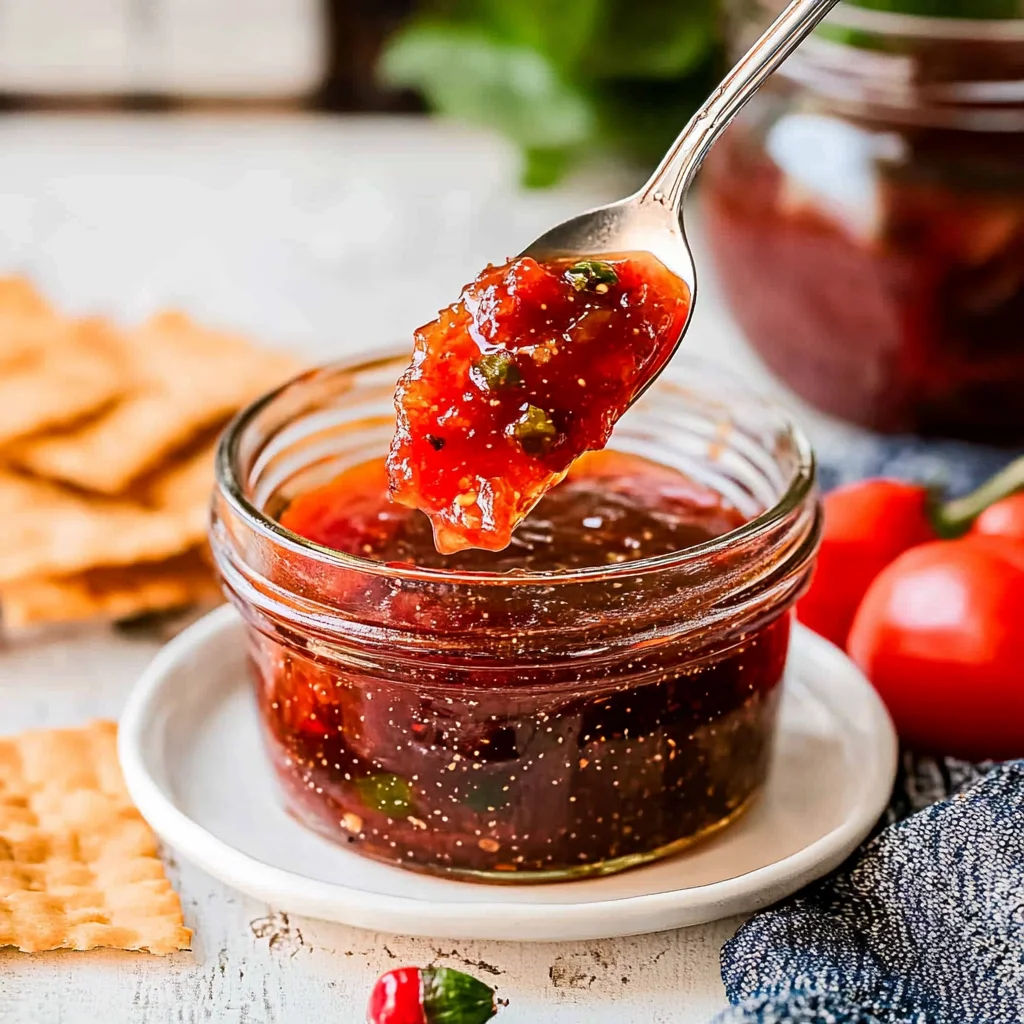
Imagine stepping into a kitchen filled with the vibrant aromas of sweet and spicy peppers mingling together, creating an irresistible invitation to taste something truly special. The vivid colors of red and green bell peppers alongside the fiery jalapeños promise a delightful burst of flavor that will dance on your palate. As the jelly simmers, it transforms into a glossy, jewel-toned concoction that not only looks stunning but also offers a tantalizing balance of sweetness and heat.
Making hot pepper jelly is not just about following a recipe; it’s about creating something memorable to share with friends and family. Picture spreading this vibrant jelly on cream cheese for an easy appetizer or pairing it with grilled meats for a unique twist at your next barbecue. With just a few simple steps, you’ll find that this delightful treat is both easy to make and incredibly rewarding—perfect for adding a touch of homemade charm to any occasion. Now, let’s dive right into the ingredients and steps to craft your own batch!
Why You'll Love This Recipe
- You’ll adore this hot pepper jelly recipe for its vibrant colors and delightful flavors that infuse every bite.
- It’s easy to make, requiring just a few simple steps and common ingredients, perfect for both novice and seasoned cooks.
- The sweet heat of the peppers beautifully balances with the tangy apple cider vinegar, creating a unique taste experience.
- Plus, this versatile jelly can be used in appetizers, sandwiches, or as a glaze, making it a fantastic addition to any meal or gathering.
Now that you’re excited about making hot pepper jelly, let’s dive into the detailed recipe!
As the jars of hot pepper jelly cooled on the counter, my family couldn’t resist popping in to taste. Their delighted reactions—eyes wide and smiles bright—were the sweetest reward for my effort in making this vibrant treat.
Essential Ingredients
To create the perfect hot pepper jelly, gather these essential ingredients to ensure a flavorful and successful outcome.
1 cup red bell pepper: Finely chop to enhance the sweetness and color of your jelly, making it visually appealing.
1 cup green bell pepper: This adds a fresh, slightly bitter flavor that balances the sweetness of the red peppers.
1 cup jalapeño peppers: Remove the seeds for less heat; finely chopping ensures an even distribution of spice throughout the jelly.
1 cup apple cider vinegar: Choose organic if possible; this ingredient provides acidity that balances flavors and helps with preservation.
5 cups granulated sugar: Measure precisely for optimal sweetness and texture; too little can prevent the jelly from setting properly.
1 package pectin: Using a brand like Sure-Jell or Ball is recommended for reliable gelling action, ensuring your jelly sets perfectly.
1 tablespoon lemon juice: Freshly squeezed lemon juice enhances flavor and acidity, crucial for preserving your hot pepper jelly during canning.
The full ingredients list, including measurements, is provided in the recipe card directly below.
Let’s Make It Together
Step 1: Prepare the Peppers:Start by washing all your peppers thoroughly under cold water. This will help remove any dirt or pesticides, ensuring you have clean ingredients. Finely chop the red bell pepper, green bell pepper, and jalapeño peppers using a food processor or a sharp knife. Aim for a uniform size to ensure even distribution of flavors in the jelly. You’ll notice the vibrant colors starting to blend together, creating an inviting mix that promises deliciousness.
Step 2: Cook the Jelly Base:In a medium saucepan, combine your chopped peppers with 1 cup of apple cider vinegar. As you bring this mixture to a boil over medium heat, give it a good stir frequently to prevent sticking. The aroma of the peppers will start to fill your kitchen—it’s a delightful prelude! Once boiling, add in the 5 cups of granulated sugar all at once, stirring continuously until it fully dissolves; this is crucial for achieving that smooth jelly texture.
Step 3: Activate the Pectin:Now it’s time to add 1 package of pectin to your bubbling mixture. Bring it back to a rolling boil and let it bubble away for exactly 1 minute while stirring constantly. This step is essential as it activates the pectin that will help your hot pepper jelly set perfectly. Keep an eye on the vibrant colors; they should deepen as everything melds together.
Step 4: Skim Off Foam:Once you’ve boiled for a minute, carefully remove the saucepan from heat. Take a spoon and skim off any foam that forms on the surface; this helps ensure your jelly is crystal clear and free of bubbles. It’s okay if some foam remains—just aim for most of it to be gone. The mixture should feel thickening already under your spoon!
Step 5: Add Lemon Juice and Jar It Up:Stir in 1 tablespoon of freshly squeezed lemon juice into your jelly mixture, enhancing its flavor and acidity for preservation. Using a ladle, pour the hot jelly into sterilized canning jars, leaving about 1/4 inch of headspace at the top—this is important for allowing expansion during processing. Wipe down the rims with a clean cloth before sealing them with sterilized lids and rings.
Step 6: Process the Jelly:To seal everything in nicely, process your jars in a boiling water bath for 5-10 minutes. You’ll want to ensure they’re sealed properly, so keep an ear out for that satisfying popping sound as they cool! Once removed from the water bath, let them cool completely on a clean towel or cooling rack while checking if the seals are secure by pressing down in the center of each lid—it shouldn’t pop back when sealed correctly.
With your hot pepper jelly ready to go, it’s time to explore some delicious ways to enjoy it!
You Must Know
- Ensure you remove the seeds from jalapeño peppers to control the heat level in your hot pepper jelly.
- I’ve found this allows the flavors of the sweet and tangy ingredients to shine through.
- Use a ladle for pouring the jelly into sterilized jars, as it minimizes spills and mess.
- This simple tool makes canning much easier and more enjoyable!
- Don’t skip the boiling water bath after sealing the jars; it’s crucial for proper preservation.
- I’ve learned that this step guarantees my jelly lasts longer on the shelf without spoiling.
As you prepare to savor your homemade creation, let’s explore some delicious ways to enjoy hot pepper jelly!
Add Your Touch
Feel free to make this hot pepper jelly your own! You can experiment by swapping out some of the bell peppers for other varieties like orange or yellow for a different flavor profile. Adding a splash of pineapple juice or diced fruit can introduce a delightful sweetness that balances the heat. For an extra kick, consider incorporating a pinch of crushed red pepper flakes or using spicier peppers. Be bold and confident in your choices—creating a signature version of hot pepper jelly is part of the fun! Next, let’s explore how to beautifully present and enjoy your homemade creation.
Storing & Serving
To maintain the vibrant flavor of your hot pepper jelly, store it in a cool, dark place. Properly canned jars can last up to one year when unopened. Once opened, refrigerate the jelly and consume it within 3-4 weeks for optimal freshness. Serve your hot pepper jelly as a delicious spread on crackers with cream cheese or as a zesty glaze for meats, enhancing any dish with its sweet and spicy kick.
Now that you’ve mastered storing and serving, let’s explore some creative pairings that elevate your hot pepper jelly experience.
Chef's Helpful Tips
- 1. When chopping the jalapeño peppers, remember to wear gloves to prevent any irritation from the oils. Removing the seeds will also help you control the heat level in your hot pepper jelly, making it more enjoyable for everyone.
- Ensure all your canning jars and lids are properly sterilized before use. This step is crucial for preventing spoilage and ensures your hot pepper jelly stays fresh longer. A quick boil in water does the trick!
- If you prefer a smoother texture for your hot pepper jelly, consider blending the mixture after cooking but before canning. Just be cautious with the blending time to avoid over-pureeing and losing that desired jelly consistency.
Now that you’re equipped with these tips, let’s dive into the delightful uses for your homemade hot pepper jelly!
Making hot pepper jelly for the first time, I watched my friends’ eyes light up with delight as they tasted it. Their joy reminded me how food truly connects us all.
How to Know It’s Done Perfectly

Your hot pepper jelly should have a vibrant, jewel-like appearance with a glossy finish. It will feel smooth and slightly thickened when cooled, while the aroma will be a delightful mix of sweet and spicy. Remember, small variations in texture or flavor are normal, so trust your instincts as you enjoy your creation! This delicious jelly is perfect for pairing with cheeses or spreading on crackers.
FAQ
What is hot pepper jelly made of?
Hot pepper jelly is made from a blend of finely chopped red bell peppers, green bell peppers, and jalapeño peppers, combined with apple cider vinegar, granulated sugar, and pectin to achieve the perfect jelly consistency.
How can I adjust the heat level in my hot pepper jelly?
To control the heat level in your hot pepper jelly, you can adjust the amount of jalapeño peppers used or keep some seeds for added spice. Removing all seeds will result in a milder flavor.
How long does homemade hot pepper jelly last?
When properly canned and sealed, homemade hot pepper jelly can last for up to one year if stored in a cool, dark place. Once opened, it should be refrigerated and consumed within a few weeks.
Can I use different types of peppers for my hot pepper jelly?
Yes, you can experiment with different types of peppers to create unique flavors in your hot pepper jelly. Just remember that the balance of sweet and spicy will change depending on your choices.
What are some ways to use hot pepper jelly?
Hot pepper jelly is incredibly versatile; it can be used as a glaze for meats, a topping for cream cheese served with crackers, or even drizzled over roasted vegetables to add a sweet and spicy kick to your dishes.
With these answers in mind, you’ll be well-equipped to make and enjoy your own delicious batch of hot pepper jelly!