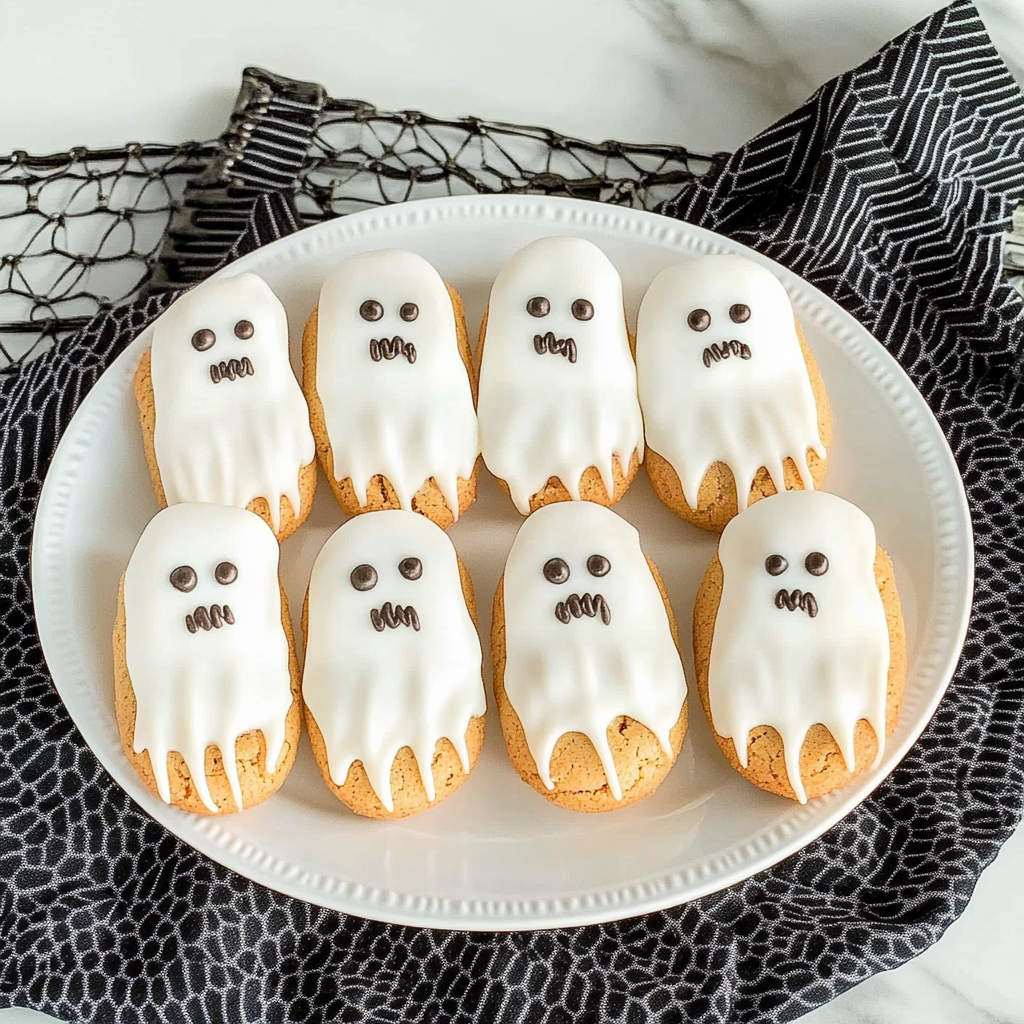
There’s something whimsically delightful about Nutter Butter Ghost Cookies. These sweet treats combine rich peanut butter flavor with a playful ghostly appearance, making them perfect for Halloween or any spooky gathering. Imagine biting into a soft, creamy cookie that has just the right amount of crunch and sweetness, all while sporting a cheeky ghost face that can make anyone smile.
The first time I made these cookies was a chaotic kitchen adventure filled with laughter and flour explosions. My friends had gathered for a Halloween party, and I thought showcasing my baking skills would impress them. Little did I know that the real magic lay in the fun we had decorating each cookie as we attempted to create ghostly masterpieces but ended up with more “abstract art” than anything else. Regardless of their appearance, the flavors were a hit, and they vanished faster than my hopes of winning ‘Best Baker’ at the party.
Why You'll Love This Recipe
- Nutter Butter Ghost Cookies are incredibly easy to make, perfect for both kids and adults
- They offer an irresistible peanut butter flavor that everyone loves and add a fun twist to your dessert table
- Visually captivating with their ghostly designs, these cookies are sure to be the highlight of any gathering
- Ideal for Halloween celebrations but delicious year-round!
I remember one of my friends declaring these cookies “spooktacular,” which led to a round of terrible ghost puns (you’ve been warned!). Their enthusiasm reminded me why I love sharing food – it brings people together in ways that nothing else can.
Essential Ingredients
Here’s what you’ll need to make this delicious dish:
- Nutter Butter Cookies: These iconic peanut butter sandwich cookies form the base; choose fresh ones for optimal flavor and texture.
- White Chocolate Chips: Opt for high-quality white chocolate chips; they melt beautifully and provide a creamy coating. For more inspiration, check out this Sno Ball brownies recipe recipe.
- Black Decorating Gel: This handy gel helps you create those adorable ghost faces; look for easy-to-use tubes in the baking aisle. easy breakfast ideas.
- Vegetable Oil: A touch of oil enhances the smoothness when melting chocolate; it keeps everything silky and prevents clumping.
The full ingredients list, including measurements, is provided in the recipe card directly below.
Let’s Make it Together
Gather Your Supplies: Start by assembling all your ingredients on the counter; this will save you from running around like a headless chicken later on. Preheat your oven to 350°F (175°C) just to get things rolling.
Melt the Chocolate: Place white chocolate chips in a microwave-safe bowl and add a drizzle of vegetable oil. Microwave in 30-second intervals until melted, stirring well to achieve a smooth consistency without burning.
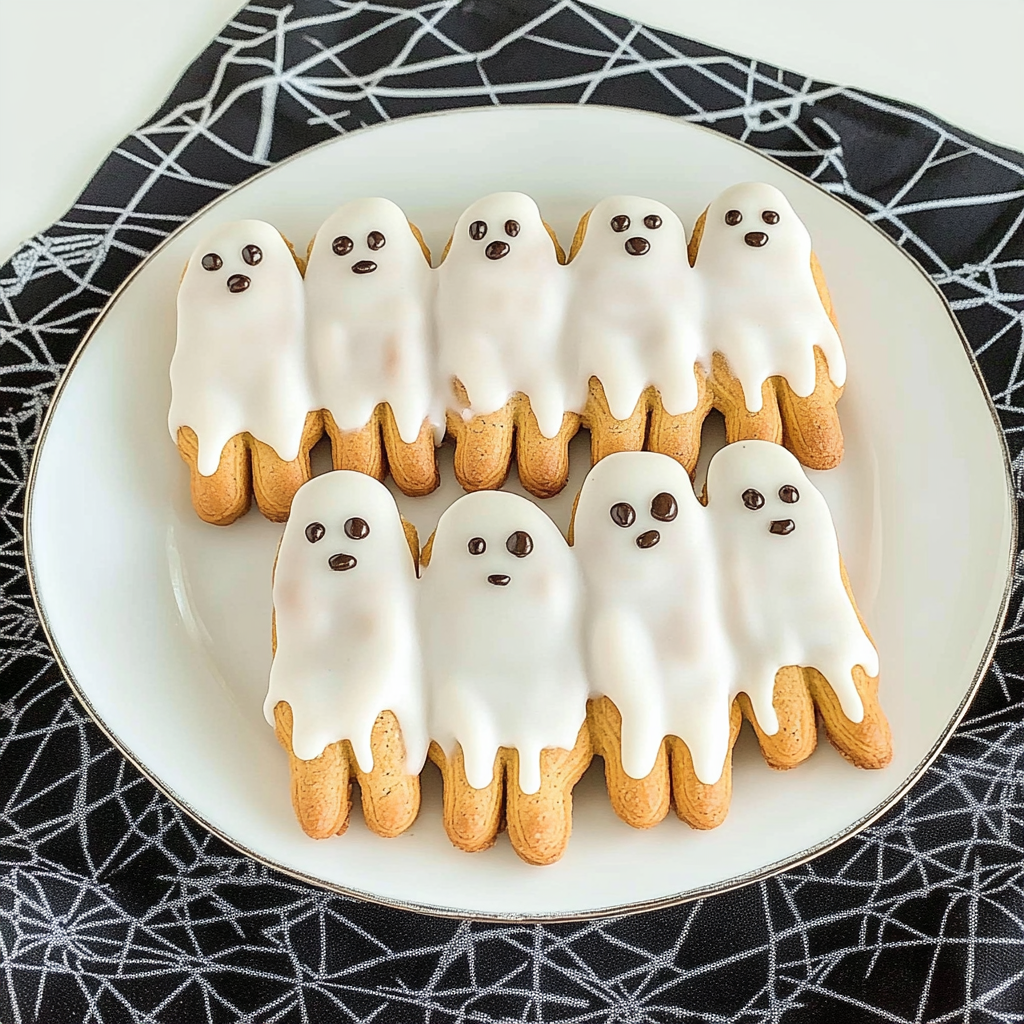
Coat Your Cookies: Dip each Nutter Butter cookie into the melted chocolate, ensuring it’s fully covered. Use a fork to lift it out, allowing excess chocolate to drip back into the bowl before placing it on parchment paper.
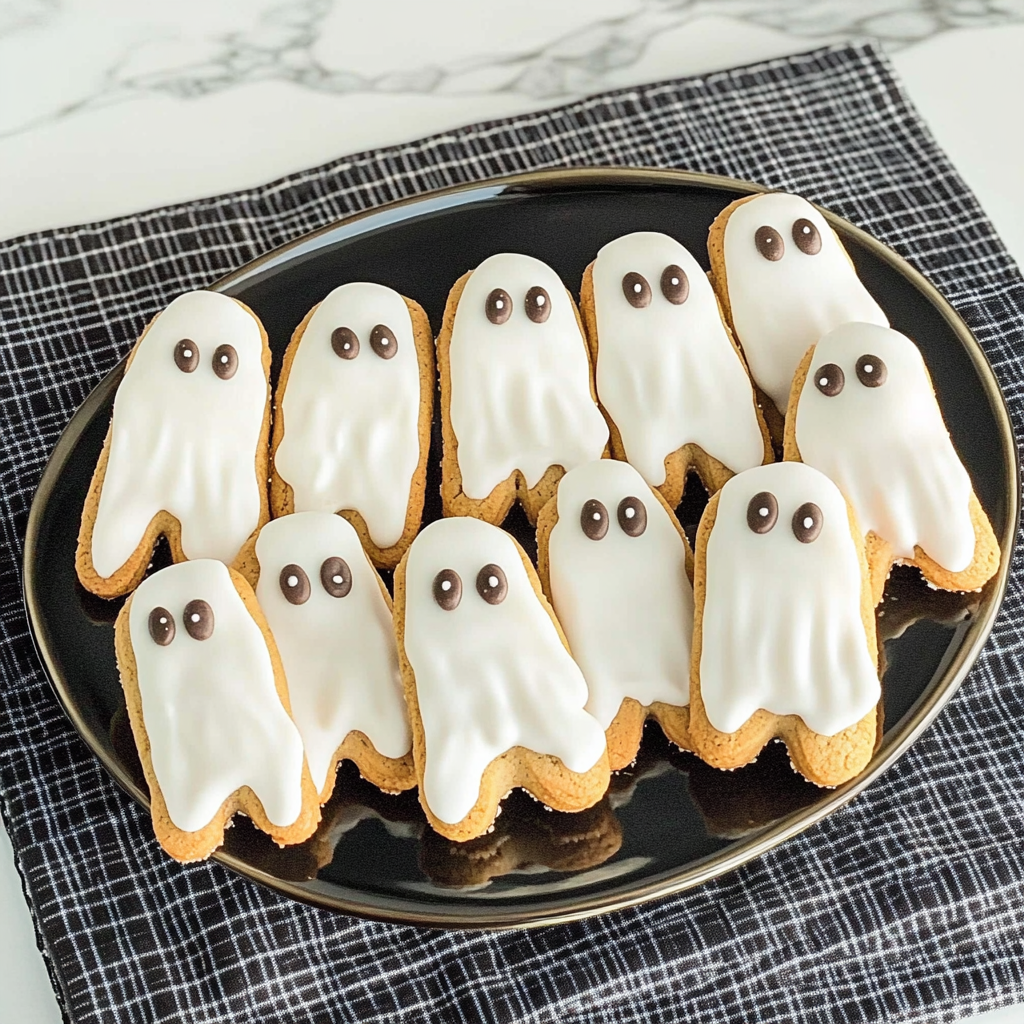
Decorate with Ghost Faces: Once the chocolate hardens slightly but is still tacky (about 10-15 minutes), use black decorating gel to draw spooky eyes and mouths on each cookie. Get creative; they don’t have to be perfect!
Chill & Set: Place your decorated cookies in the refrigerator for about 20 minutes until everything is set perfectly. This will help solidify your masterpiece so they can be enjoyed without melting everywhere.
Serve & Enjoy: Once chilled, arrange your Nutter Butter Ghost Cookies on a festive plate or platter. Watch as everyone’s faces light up when they see your spooky treats!
With these simple steps, you’ve turned ordinary cookies into delightful little ghosts that bring joy and laughter. Snatch one before they’re all gone; trust me, they’ll disappear fast!
You Must Know
- These Nutter Butter Ghost Cookies are not only adorable but also a delightful treat that will impress your friends and family
- Their creamy filling and spooky design make them perfect for Halloween parties, and they’re surprisingly easy to whip up!
Perfecting the Cooking Process
Start by melting chocolate while mixing the peanut butter filling. Assemble the cookies quickly to ensure the chocolate adheres well, creating a perfect ghostly shape.
Add Your Touch
Feel free to swap out the white chocolate for dark or milk chocolate depending on your taste preference. You can also experiment with different fillings like Nutella or crushed candy corn.
Storing & Reheating
Store these cookies in an airtight container at room temperature for up to five days. If needed, briefly chill them in the fridge to maintain their texture before serving.
Chef's Helpful Tips
- Use high-quality chocolate for coating; it enhances both flavor and appearance
- Don’t overheat the chocolate; it can seize up quickly when melted
- Ensure your workspace is cool to prevent melting during assembly
Sometimes, I wonder if my family loves these cookies more than me! Last Halloween, they mysteriously disappeared before I could even snap a photo.
FAQ
Can I use regular peanut butter instead of creamy?
Yes, but creamy peanut butter creates a smoother filling for better ghost shapes.
How can I make these cookies vegan?
Use dairy-free chocolate and swap peanut butter with almond or sunflower seed butter.
What’s the best way to melt chocolate?
Melt chocolate slowly using a double boiler or microwave in short intervals to prevent burning.
Nutter Butter Ghost Cookies
- Total Time: 0 hours
- Yield: Makes about 16 cookies 1x
Description
Nutter Butter Ghost Cookies are a fun and delicious treat that will elevate your Halloween festivities! With their rich peanut butter flavor and playful ghostly designs, these cookies are sure to impress both kids and adults alike. Perfect for gatherings or as a festive dessert, they’re easy to make and even more enjoyable to decorate. Indulge in the delightful combination of creamy chocolate coating and whimsical ghost faces that will have everyone smiling!
Ingredients
- 1 package Nutter Butter cookies (about 16 cookies)
- 1 cup white chocolate chips
- 1 tablespoon vegetable oil
- 1 tube black decorating gel
Instructions
- Preheat your oven to 350°F (175°C) if baking any accompanying treats. Gather all ingredients on your counter.
- In a microwave-safe bowl, combine white chocolate chips and vegetable oil. Microwave in 30-second intervals, stirring until smooth.
- Dip each Nutter Butter cookie into the melted chocolate until fully coated. Use a fork to lift and allow excess chocolate to drip.
- Place cookies on parchment paper and let them sit for about 10-15 minutes until the chocolate is tacky but not completely set.
- Decorate each cookie with black gel to create ghostly eyes and mouths.
- Chill in the refrigerator for about 20 minutes until the chocolate is firm.
- Serve on a festive platter and enjoy your spooky treats!
- Prep Time: 15 minutes
- Cook Time: N/A
- Category: Dessert
- Method: Baking
- Cuisine: American
Nutrition
- Serving Size: 1 cookie (28g)
- Calories: 150
- Sugar: 12g
- Sodium: 60mg
- Fat: 8g
- Saturated Fat: 3g
- Unsaturated Fat: 5g
- Trans Fat: 0g
- Carbohydrates: 18g
- Fiber: 1g
- Protein: 2g
- Cholesterol: 0mg